
This insight will highlight some common slurry testing mistakes that I’ve seen over the years. Avoiding these common mistakes could help keep your process running smoothly.
Viscosity
Viscosity testing, although at first glance appearing simple, can be a little bit more complicated. One of the standard ways to check viscosity is to use a dip cup of some sort, and depending on the required viscosity of the slurry, most people would be using a Zahn 4 for backs up slurries or a Zahn 5 cup for primary slurries.
Viscosity measurements can be problematic. For a start, different users all doing the same test with the same cup are likely to all be getting different results, this is just down to every one’s reaction times.
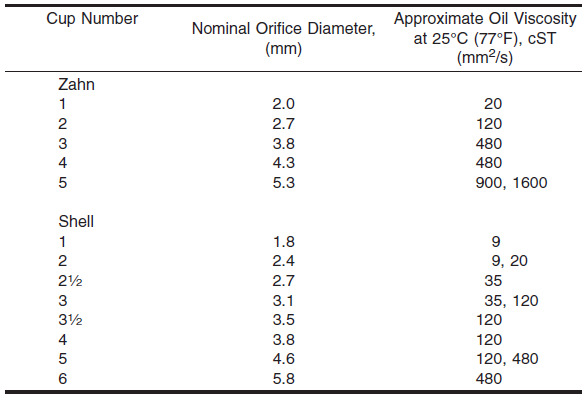
Zahn cups are also likely to see a lot of wear and tear, and very little cleaning. This can lead to the body of the cup being damaged, the orifice of the cup becoming too big, or reducing in size. So, it is important to take great care of your measuring cup, and clean in after every use. It is also good practice to regularly check your in-use cups against a reference cup of the same brand (cheap eBay Zahn cups might not give the same readings as their more expensive counterparts). The table below is from ASTM D4212, showing the orifice size for each cup.
The biggest issue with using Zahn cups, and other measuring cups is “when do you start and stop recording the time?” On Zahn cups, you need to fully immerse the cup in your slurry, and leave it in there for a few seconds or so to temper. As you lift the cup out, start timing just as the cup breaches the surface of the slurry.
When should we stop recording the time when measuring viscosity? There seem to be many opinions on this. “When there is a break in the stream 1 inch below the cup”, “when the stream brakes at the cup opening”, etc. However, ASTM D4212 tells us to “Stop the timer at the first definite break in the stream at the base of the cup. The efflux time in seconds constitutes the viscosity.” (ASTM International. 2016.)
If you are not doing this, and your measurements are just to compare how your slurry was yesterday to how it is today for instance, there is no reason to change your method, as long as you are consistent with how you are doing it in your foundry. A method that is seen a lot is to look down into the Zahn cup, and time until you see the orifice appear, this may be less subjective than spotting the break in the stream
It might also seem obvious to some, but use a working stop watch. It can be costly to drop your latest iPhone into the slurry tank, and a clock on the wall isn’t the best tool for the job either.
If you do notice your readings are all over the place, check that you slurry is fully mixed, and all refractory is wetted out correctly, and try to dip your cup in the same area of the tank for every reading.
pH
Controlling pH was covered by Bob Brown in the Insight which can be found here: www.remet.com/uk/remet_insights/ph-control-investment-casting-slurries/
This article is well worth a read to help understand what pH is, and why it should be controlled.
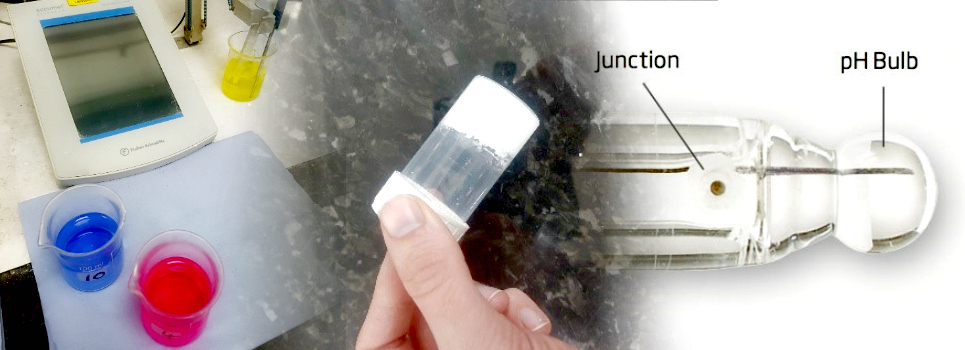
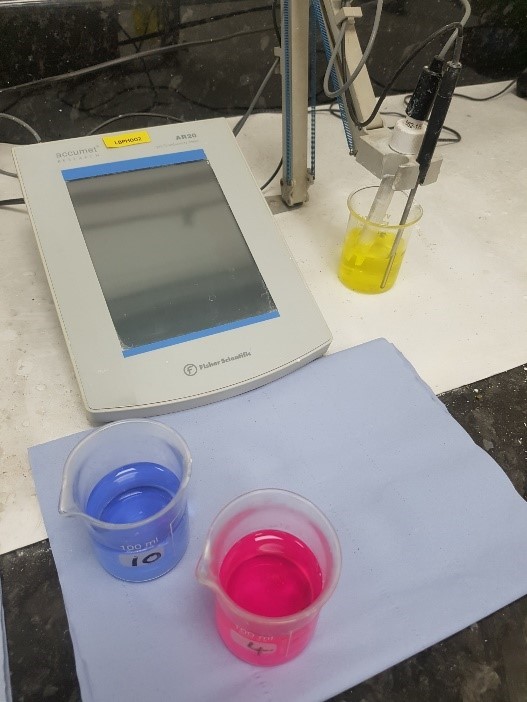
A Standard pH Meter, and Buffers
It is common that pH meters are often not calibrated routinely. pH should be tested with a meter that is calibrated every day before use. Performing a 3-point calibration using fresh pH 4, 7 and 10 buffers is advised for best results.
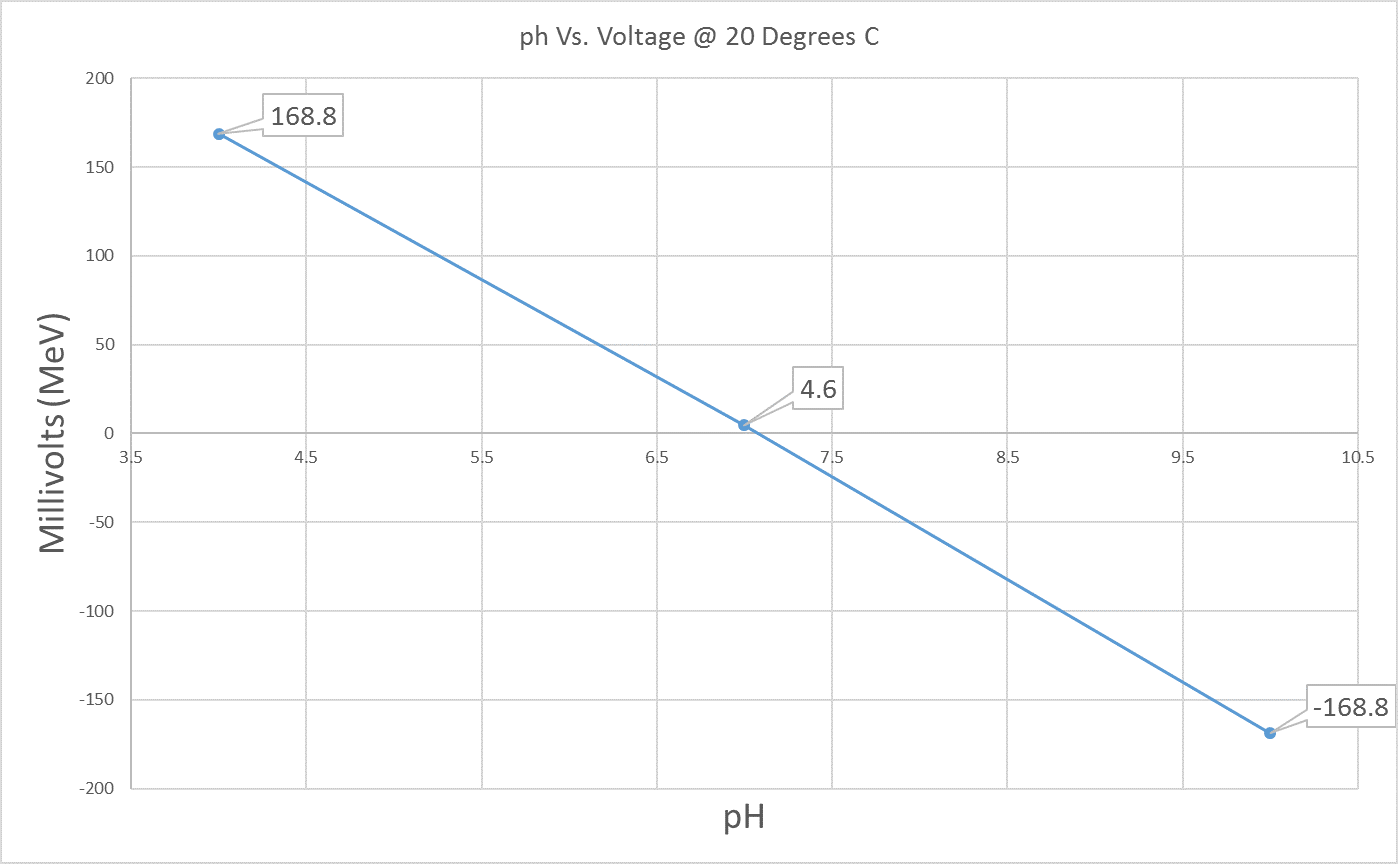
If you are having issues with calibrating a pH meter, or with your readings after calibrating, then you can check the reading of your buffers in millivolts.
“When measuring pH buffers, a standard pH electrode will give a known response in mV so for pH the mV result should be 0 +/-25mV the results at 4/10 should be 177 +/- 10% (these values are at 25 degrees, slightly lower values will be seen at 20 degrees). If these values are a long way from the expected normal, then it is likely there is a problem with either the electrode or the buffers” (The Laboratory People. 2017).
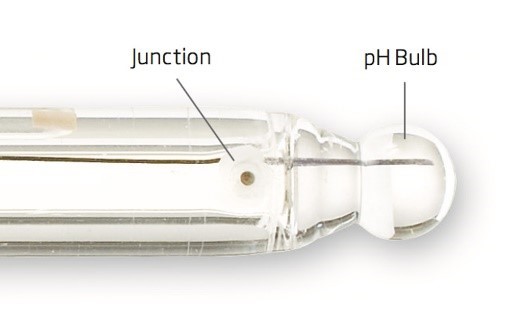
pH probes can be very fragile, they need to be cleaned with deionised (DI) water before and after every use, and they should be checked for damage, especially the small glass bulb. This bulb can be hard to spot if its broken unless you look right at it, so unusual readings could be accepted if this is not routinely checked. he probes can also easily dry out, so it is essential to store them in pH7 buffer between uses.
Slurry Specific Gravity/Density
Although this is one of the easiest tests going, there are still a few factors that need to be considered when performing this test.
The specific gravity of a sample is affected by temperature. A warm sample will expand slightly, so a lower density may be recorded for instance. So, it is important to carry this test out under the same conditions each time. The biggest cause of errors seen in this test is dirty glassware. Dried slurry stuck inside the measuring cylinder you are using will reduce the volume of the glassware, and lead to a smaller quantity of slurry being weighed, and there for a lower density. This could cause unnecessary additions of refractory. It’s important to keep glassware clean, and replace it if it becomes too dirty.
It is also possible to easily read the incorrect volume of slurry poured into a measuring cylinder.
Make sure you are level with the graduations of the measuring cylinder, so you can see the level of the slurry straight on, looking down, or up to the level will create parallax errors.
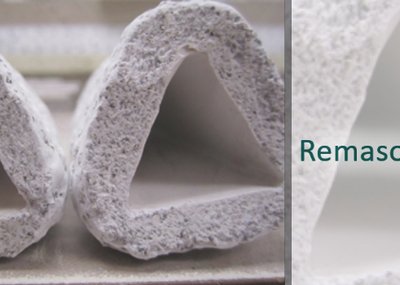
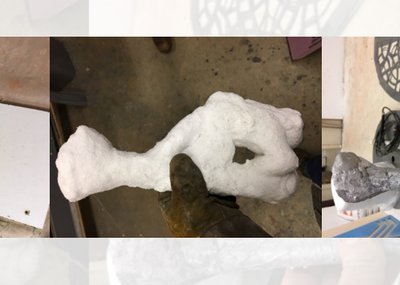
Accelerated Gel Test
Gel tests can be used to indicate the shelf life of the slurry. A sample of the binder is poured into a plastic of glass bottle, and sealed so it’s airtight. The height of the binder in the bottle is marked, and the sample labelled. This can then be put in a 60°C oven for 48 hours.
A Failed Gel Test
Any thickening indicates the slurry is beginning to gel, a fully gelled slurry indicates the slurry is very unstable and actions should be taken immediately. In severe cases a total refresh of the slurry may be needed. Any evaporation of the water part of the binder can cause a gel however. This is one of the main areas that will create a false fail, water evaporating from the sample as the sample bottle was not air tight. Always tightly screw on the lid, and inspect for any cracks in the bottle. If the sample has gelled after being in an incubator, but the binder level has dropped from the mark you drew on, this is a good indication that the bottle was not air tight, and you will need to repeat the test.
It is good practice to “calibrate” the engineers who will be reading off these tests, this can be done for instance by getting everyone to mark completed gel test samples as a pass or fail, and then all coming to an agreement on what is acceptable as a pass.
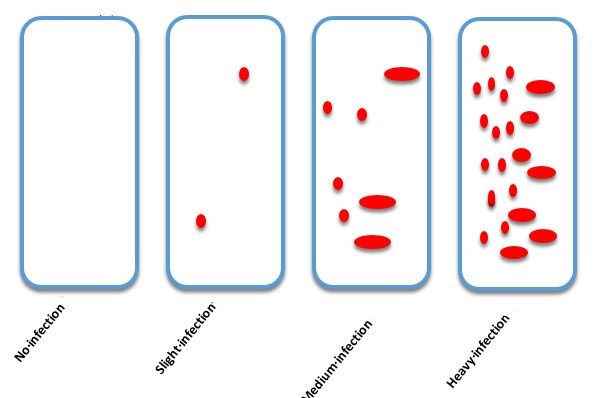
Bacteria Testing
This test should be carried out in a clean environment, the binder portion of a slurry is carefully pipetted over the surface of a dip slide, much like the ones seen in the image below. These dip slides are then sealed, and incubated at 30°C for 48 hours. After the incubation period, any bacteria can be identified as growth on the agar dip slide. It is highly recommended that a new blank slide is run alongside sample slides to eliminate the potential of false positives being accepted as genuine.
Another common mistake with this test is having he dip slides open for too long, this has the potential to introduce bacteria and mould naturally present in the surrounding environment.
To be sure your results are accurate with all testing you do, don’t just take one reading. Always take several readings, and then calculate an average, this way you can be positive of your results.
References
ASTM International. 2016. ASTM D4212-16 Standard Test Method for Viscosity by Dip-Type Viscosity Cups. ASTM International, West Conshohocken, PA, 2016, doi.org/10.1520/D4212-16
Tan Sek. 2010. HBMT 2103: TEACHING MATEMATICS IN YEAR TWO. [ONLINE] Available at: tansek64.blogspot.co.uk/2010_11_01_archive.html. [Accessed 22 May 2017].
Hanna Instruments. 2017. Guidelines for pH Electrode Maintenance and Use – Hanna Instruments. [ONLINE] Available at: hannainst.com/ph-electrode-maintenance-calibration-guide. [Accessed 22 May 2017].
The Laboratory People. 2017. What is the mV mode on my pH meter used for? – The Laboratory People. [ONLINE] Available at: camblab.info/wp/index.php/what-is-the-mv-mode-on-my-ph-meter-used-for/. [Accessed 07 June 2017].
Merriam-Webster. 2017. Slurry. [ONLINE] Available at www.merriam-webster.com/dictionary/slurry [accessed on 08 May 2017]
Disclaimer
Contact your nearest REMET Sales Office regarding product specifications.
Contact your REMET Territory Manager and visit www.remet.com if you have any questions or require additional information.
Information and/or recommendations based on research and technical data believed to be reliable. Offered free of charge for use by persons with technical skills, at their own discretion and risk, without guarantee of accuracy REMET makes no warranties, express or implied, and assumes no liability as to the use of its products or of any information pertaining thereto. Nothing herein is intended as a recommendation to infringe any patent.


